

Valentine’s Love Owls
Welcome to my Crafty Handed World dear strangers! I think it is still time to make some last minute Valentine’s gift. I must say, I got inspired by the owl flood this year and had to make my own little shabby Love Owls. They are adorable 🙂 And you can write your message on the heart.
FEB 12, 2024 >
They are so simple, quick and cute!
So let’s get right into it.
Preparations
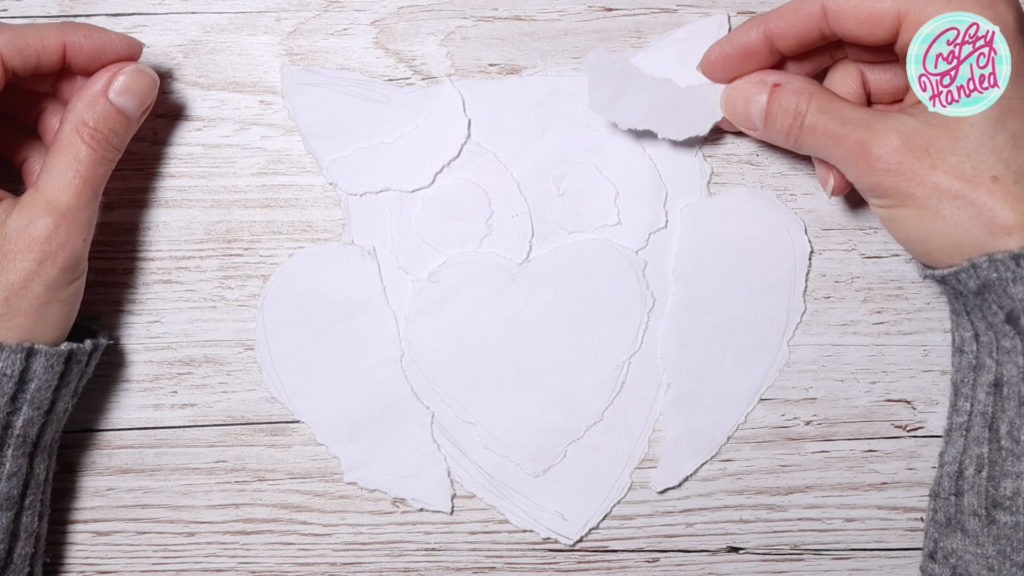
I started by sketching my simple design and tearing it out of paper to see what it would look like.
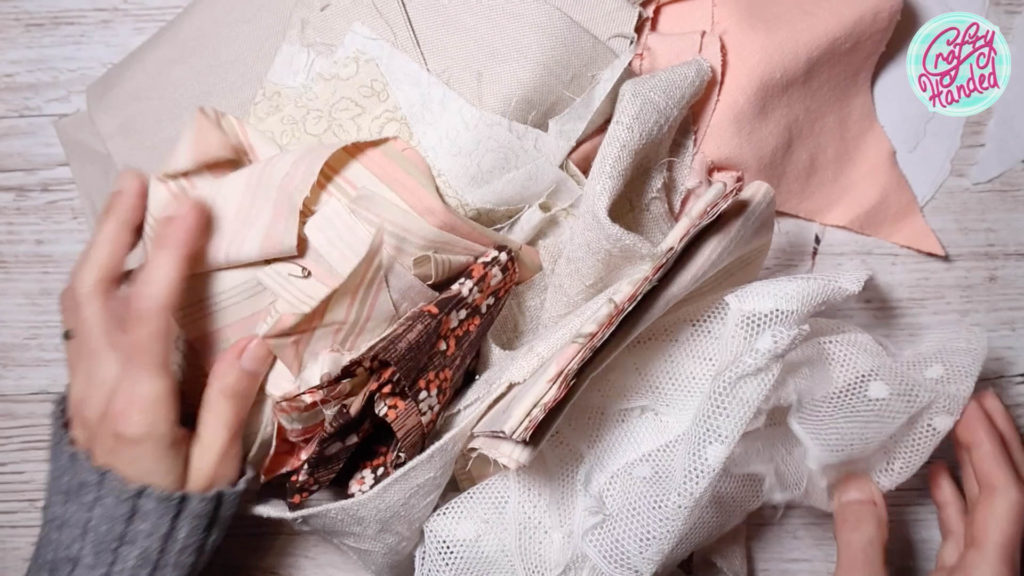
Then I went through my fabric clippings and found a bunch that seemed to go together and selected a few for each little owl.
I simply cut out all the individual shapes roughly based on my paper templates. The body and wings twice so I could fill them later, and all the other shapes once. I picked a different fabric for each side of the wings, but don’t let your imagination stop you.
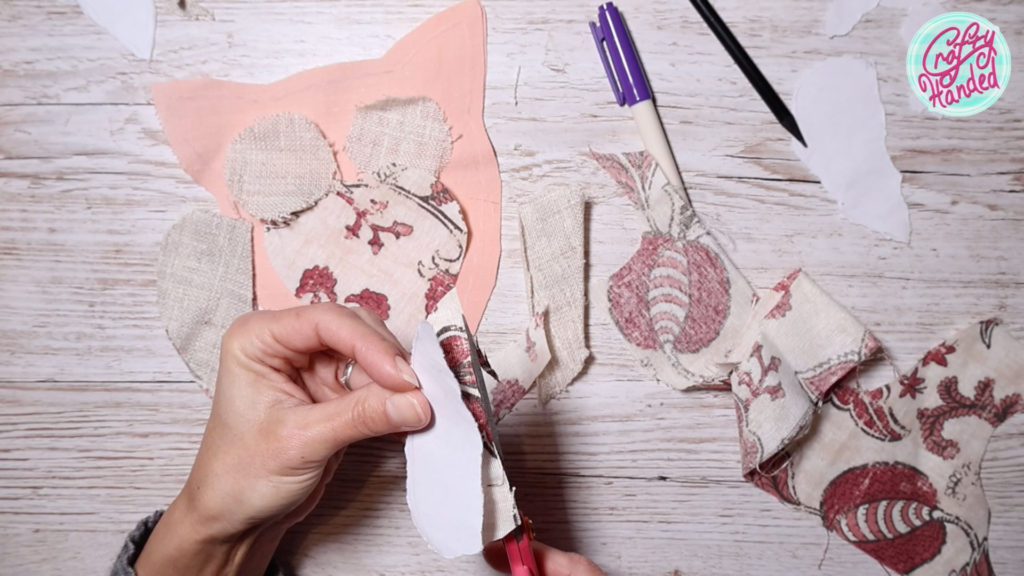
Then, I distressed all the edges. You can use your fingers or a side of the scissors.
Sewing/ Gluing the Love Owls
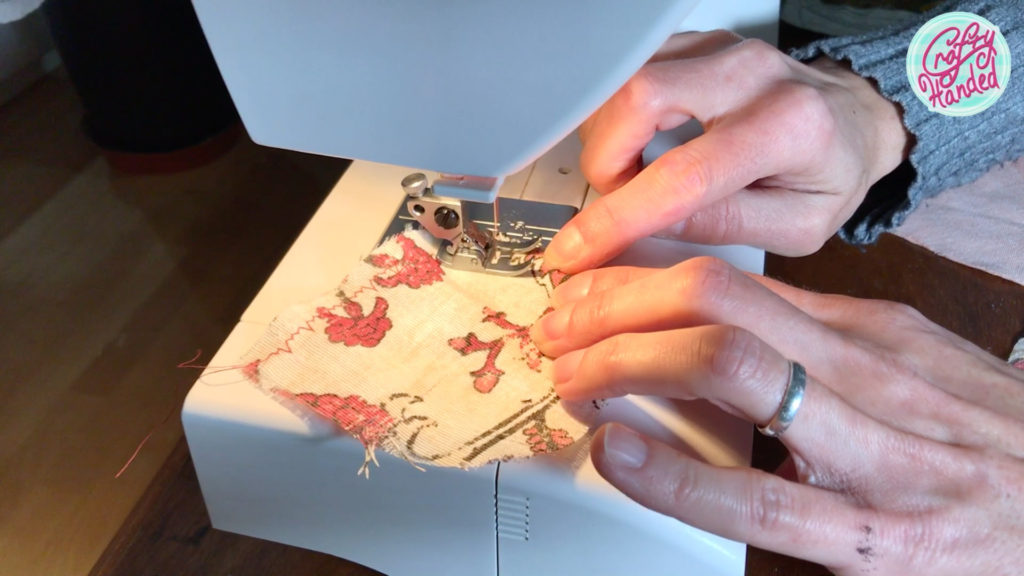
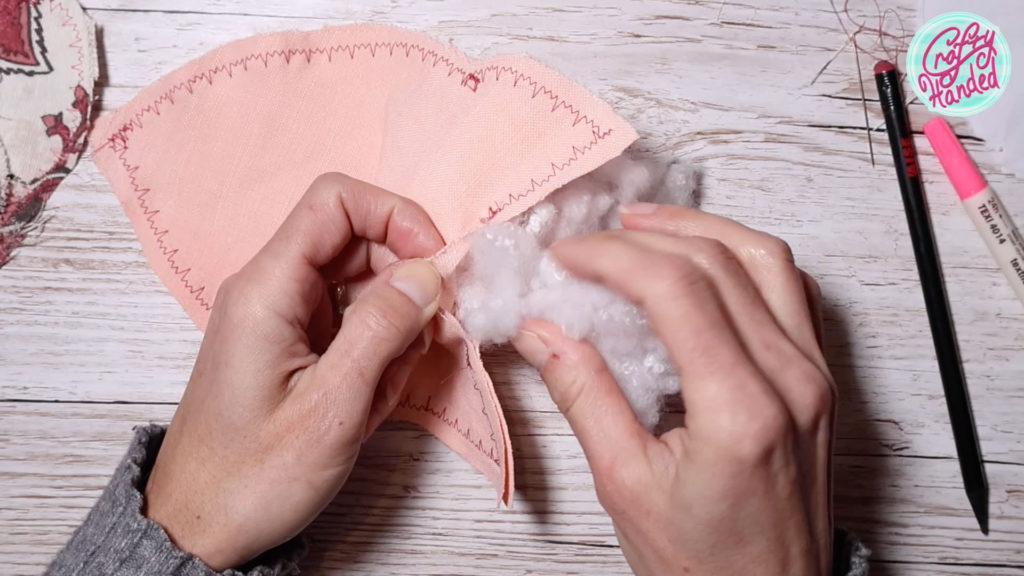
Next, I am going to sew around the edges with a zigzag stitch. To decorate them and stop the unraveling. I will sew the wing pieces together, leaving a small gap for the filling later, as well as the body. So let’s go sewing or gluing if you want. No need to be very precise. The goal is the shabby look. Besides, there will not be any stress on the seams. It is only a decoration.
After filling the body, I hand-stitched the opening closed. You don’t really need any sewing skills remember the shabby look. And if you don’t feel like sewing at all, you can always use a hot glue gun to attach the pieces together. You can even draw the stitch lines with a liner pen.
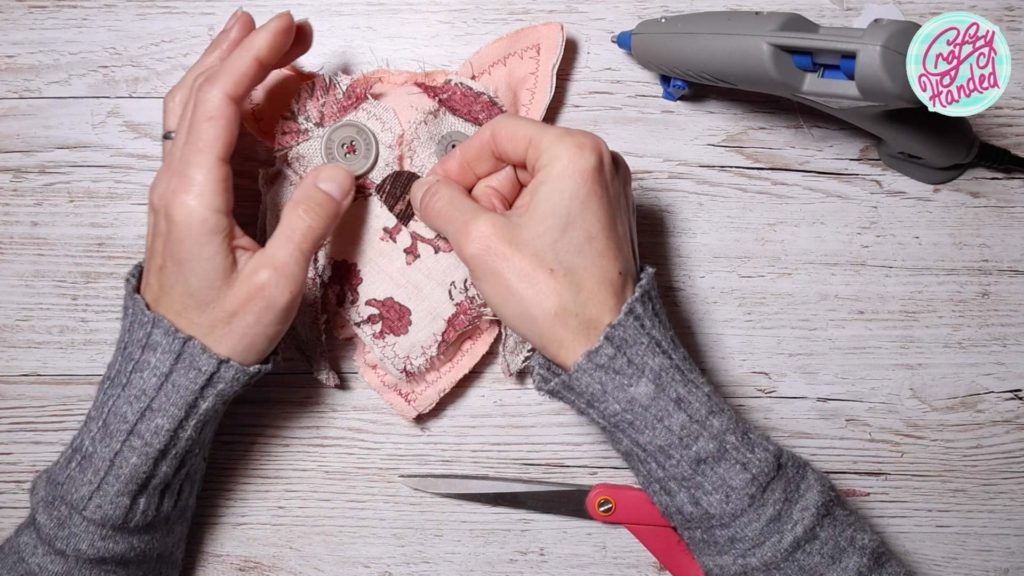
Once the body is done, we can start putting things together. First, I place the eyes and then the heart over them. I suggest making it slightly smaller than I did on this one, it will be more obvious.
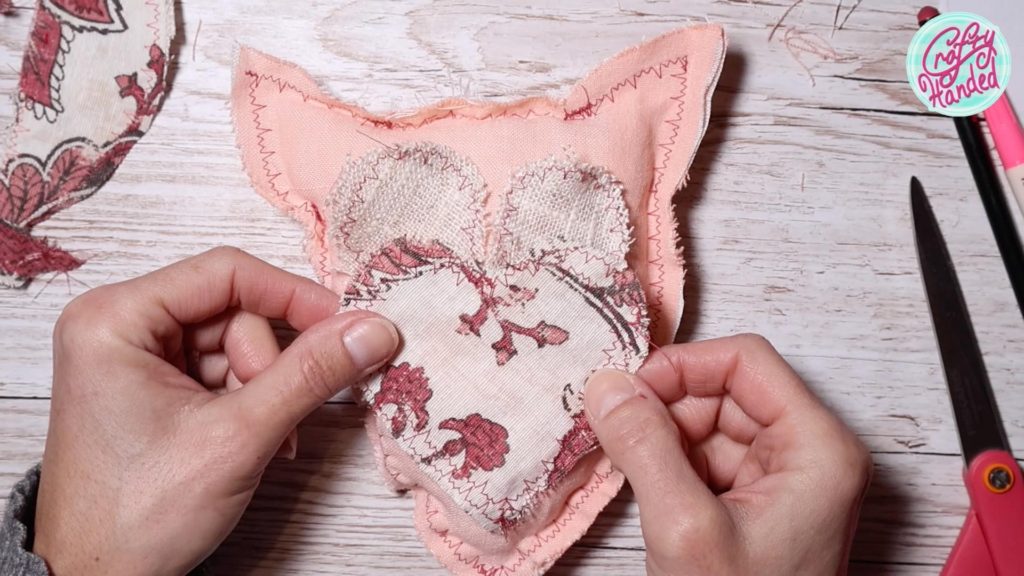
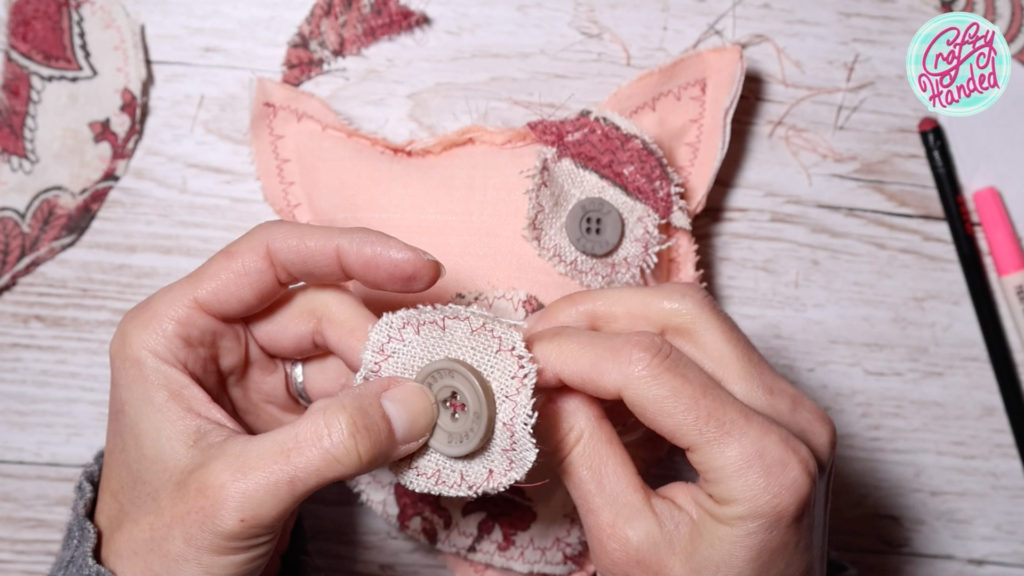
I like the button eyes, so I looked through my button collection to find some that would work. Finally, I decided to go with the lighter ones.

Assembling the Love Owls
I hand-stitched them to the eye pads before attaching them to the owl’s body.
I filled the little wings the same way as I did the body, using a small amount of the filler. Stitching it closed.
To make things easier and shabbier, I decided to hot glue the eyes on the body, the heart over the eyes. The eyebrows on top of the eyes and finally, the wings.
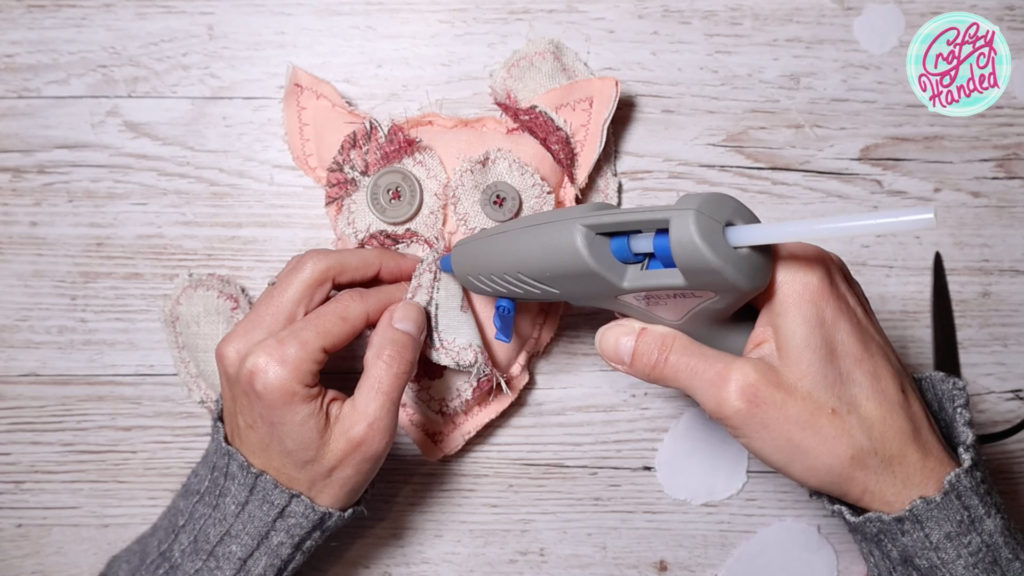
I think she is still missing something… oh yes, a little beak. That’s better.
And since I have all my supplies and tools out, I made another one really quickly.
If you have a single-colored heart, you can always write your love message on it.
I think they came out as lovely as little love owls can be. What do you think? Please let me know in the comments.
If you want to see the whole process, don’t miss my video on my YouTube channel …And if you like what I do and would like to support me, please become my Patron.
If you are enjoying my videos, please like, share, and subscribe. You know that always helps. Thank you for watching!
More Crafty Posts
-
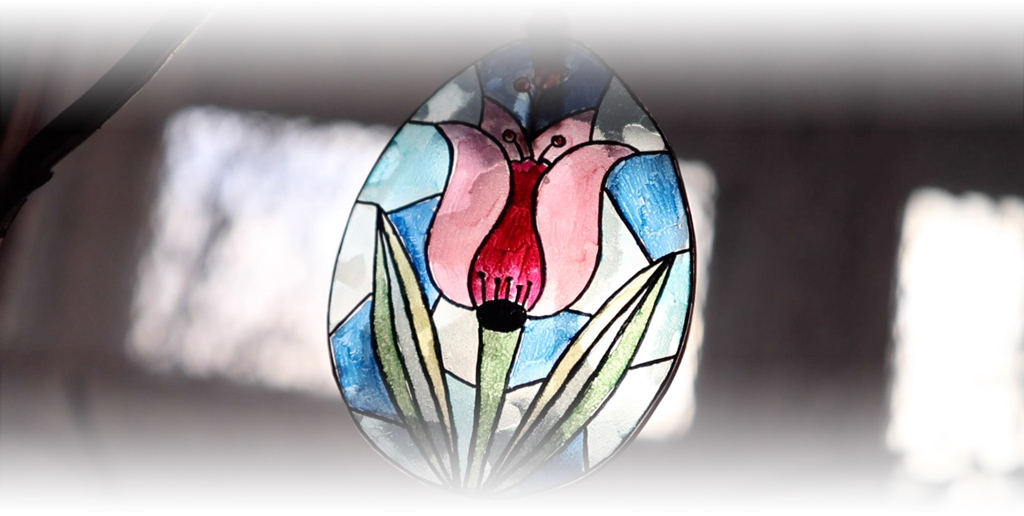
Stained Glass Easter Eggs
Let’s do an easy Easter decorating project. Faux stained glass Easter egg ornaments – No glass and eggs needed :), but shrink plastic and markers…
-
Valentine’s Love Owls
Let’s make an adorable last minute Valentine’s Love Owls gift. And you can write your love message on their heart!
-
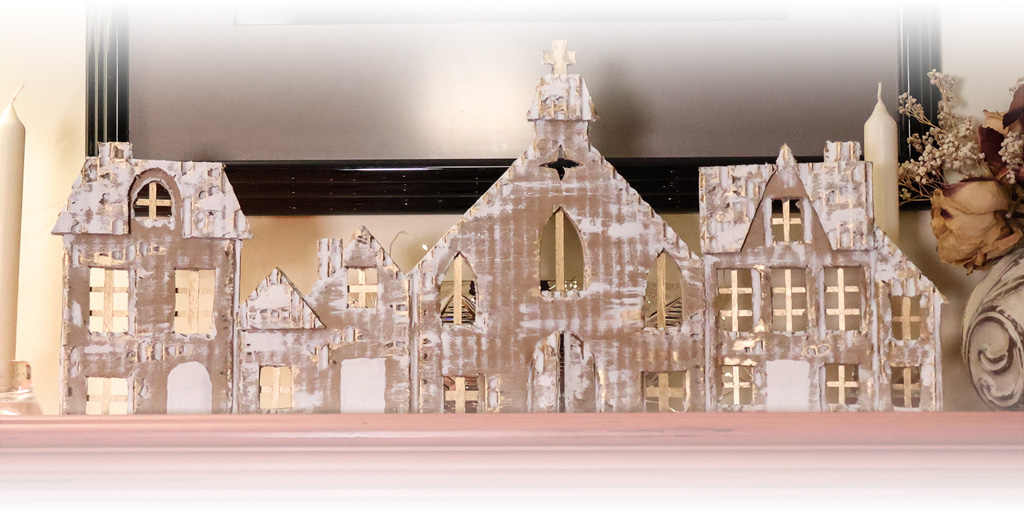
Rustic Cardboard Christmas Villages
Easy and impressive way to make rustic Christmas Villages on budget from corrugated cardboard boxes.