

How to clean the Apple Magic Keyboard!
My cat usually just sends keyboard vomit messages. Well, the other day, she decided to take it a step further! And I had to find a way to save it and clean my OLD Apple Magic keyboard. So here are my useful tips on cleaning the keyboard spill! (It should work on drink spills too.)
As you can imagine, this was not my planned and carefully scripted post… But I thought it might be helpful to share my tips… accidents happen, and I have spilled coffee into my keyboard countless times.
I hope you can find this help in time. My problem with browsers is that the correct search results never show up when I really need them. They start popping up only after I find my own solution.
Cleaning the OLD Apple Magic Keyboard
- Preparations
- Removing the Keyboard Keys
- Cleaning the Keyboard Keys
- Cleaning the Apple Magic Keyboard
- Magic Keyboard Assembly
- Video Tutorial
So what do you do when your cat throws up on your keyboard?
First, round up the cat and wipe the keyboard with it… Just kidding!! DON’T hurt your cat!
Well, you could just go buy a new keyboard, but it is always better to try to save things before throwing them out. Besides, there is always time for that later if all fails. I am going to show you how you can clean your Apple Magic Keyboard from vomit and spills and give you a few useful tips.
Note: The tips on removing and re-installing your keys might not work if you have a different type of keyboard. The washing is universal 🙂
Start by taking a picture, so you have something cool to show to your friends. Also, it might be helpful when you need to remember where the keys go after we are done cleaning them.
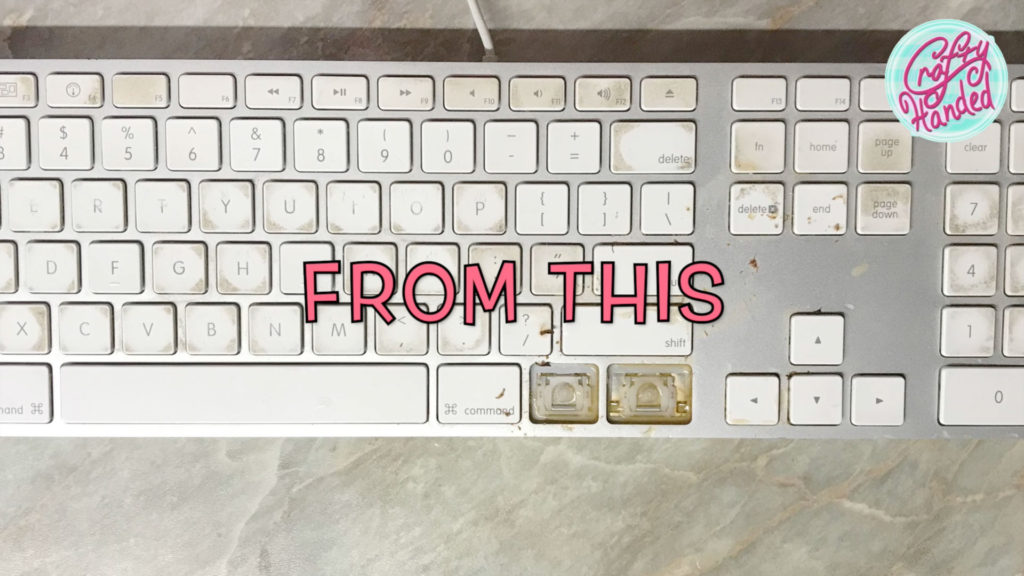
Before we go any further, UNPLUG the keyboard from your computer or remove batteries if you have a wireless, unlike me. And also, remember, time is your enemy. Start working on it as soon as you can while the spill is still wet. It doesn’t work when it is all crusted up and dry.
Removing the Keyboard Keys
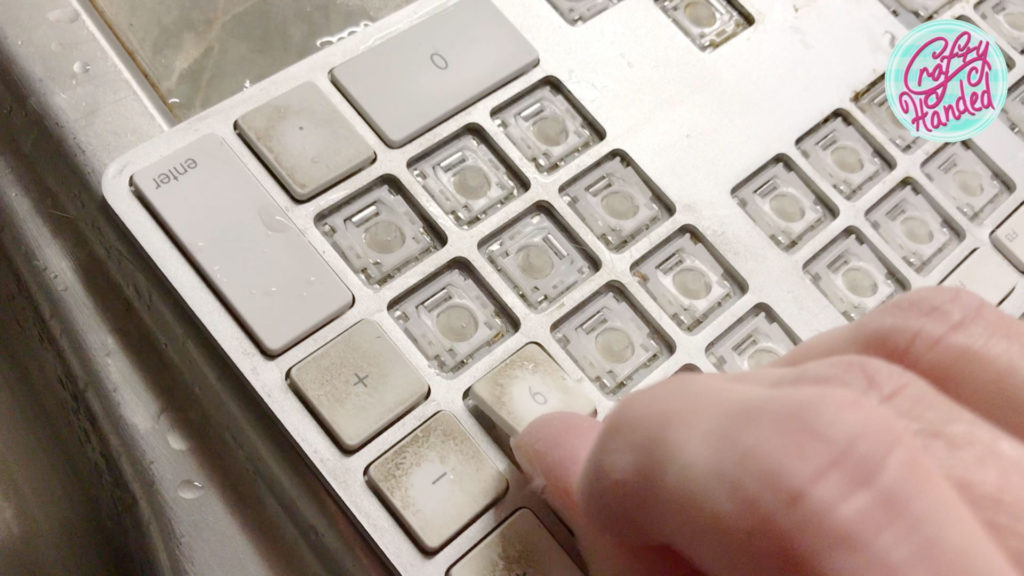
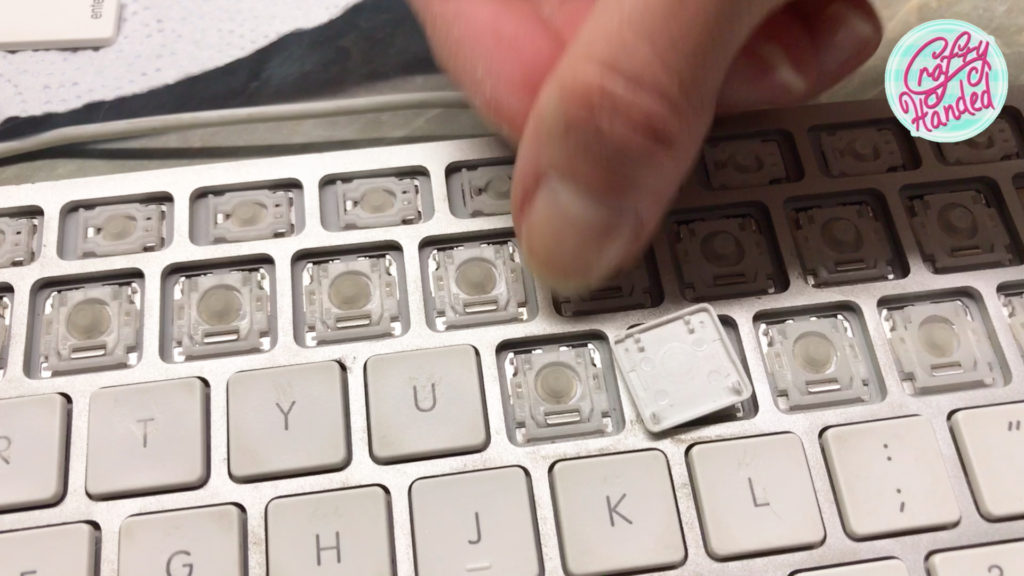
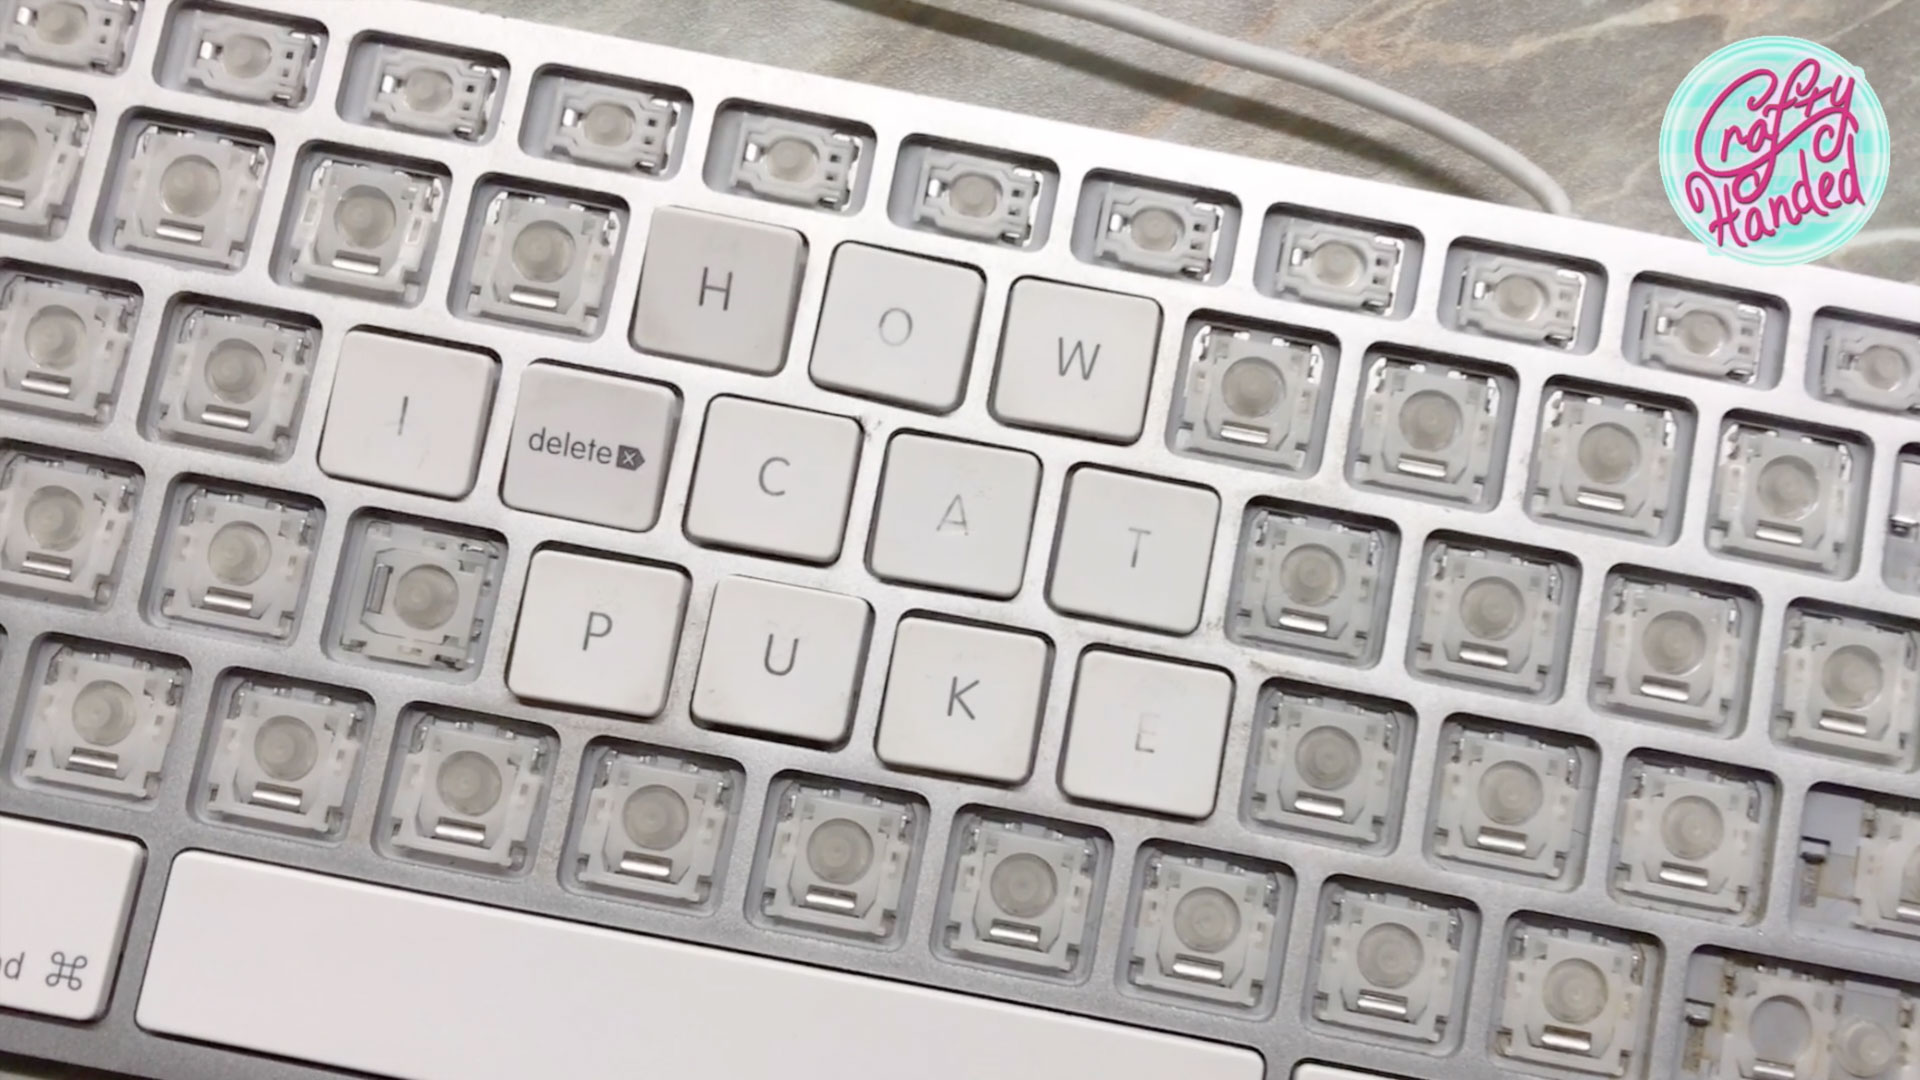
First, wipe off any BIG mess with a paper towel, unless you’ve already used your cat. If there is too much goo under your keys, it is good to carefully remove them. I found out the easiest way is to turn the keyboard 180 degrees, looking at the letters upside down. Get your nail (or something thin) under the left bottom corner of each small square key and gently but firmly pop it out. There are a few exceptions though, so I have drawn a little chart here. I marked the corners that are easiest to pop up in red in the following picture.
(Beware, the wire placement and the key design might be different on newer keyboard models!)
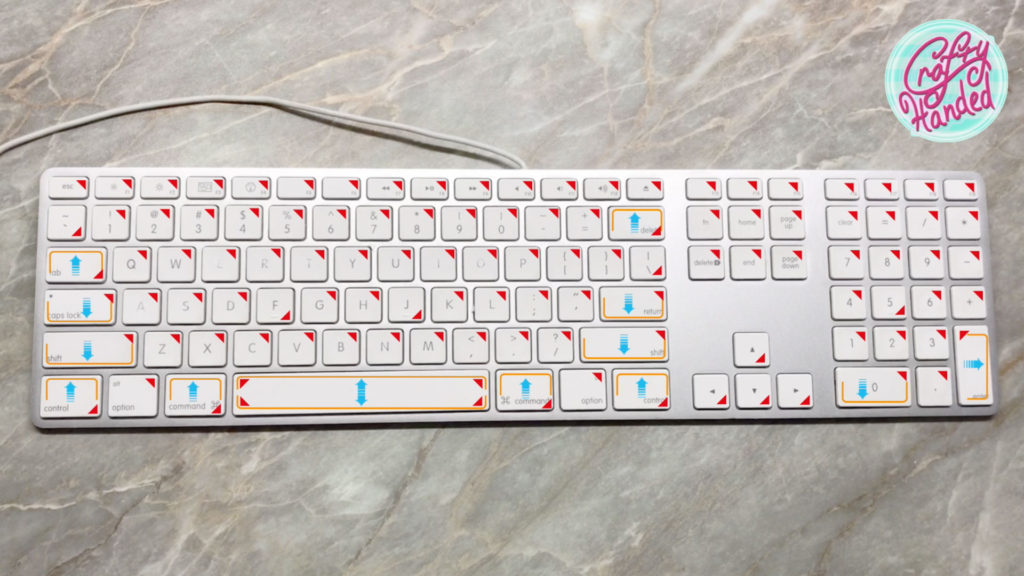
Notice, that some square keys are oriented sideways (like F, J, 5, the arrows…).
Now with the longer keys, you need a slightly different approach and be even more careful. They are held down by a small wire (I marked their placement in orange), see the chart.

Some have the wire at the top, some at the bottom. So you need to partially pop the keys out and then gently slide the wire out of the little hole anchors, in the blue arrow direction. The spacebar is the trickiest one. It has wires from both sides – top and bottom. Pop it up partially and then wiggle it gently up and down, pulling it towards you.

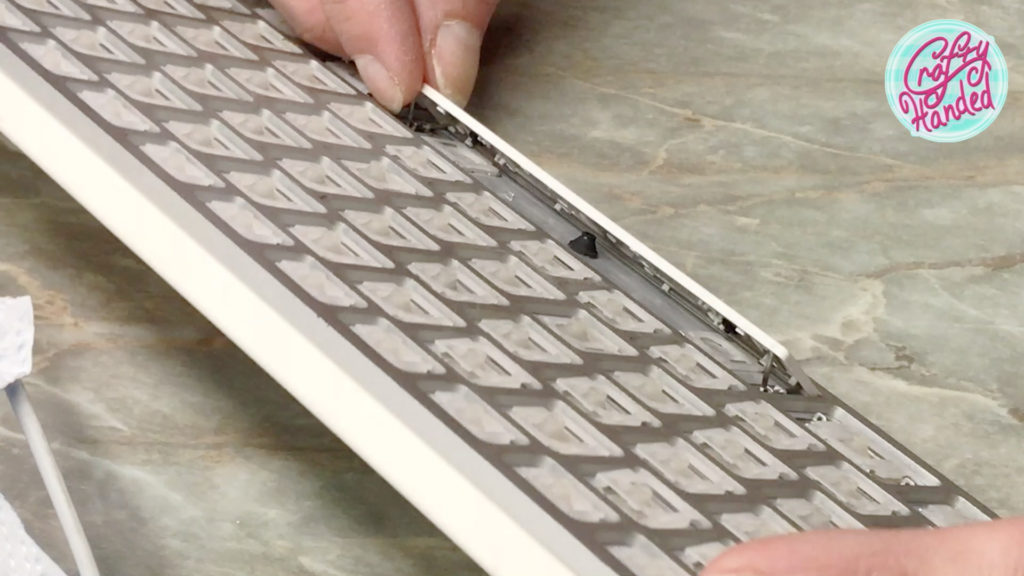
Remove all the keys you need to. I ended up stripping the keyboard completely because I realized it was disgusting to start with.
Cleaning the Keys
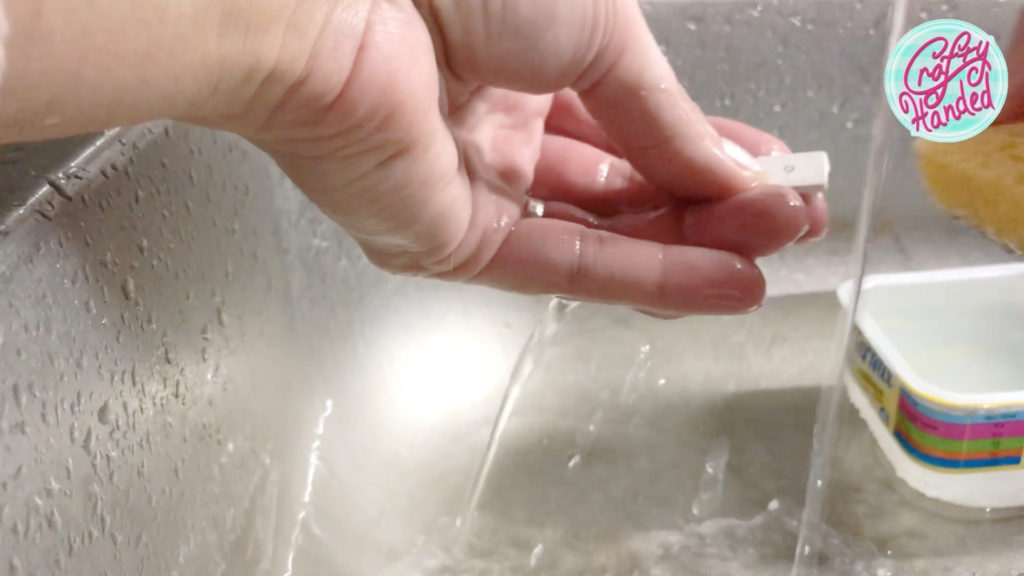
Wash all the loose keys in warm water with mild dish soap. Don’t use any harsh cleaners! Or you will end up with blank keys, and you will need to paint a whole new alphabet on them :). Also, don’t leave them laying around, or your cat will lose them.
Cleaning the Apple Magic Keyboard
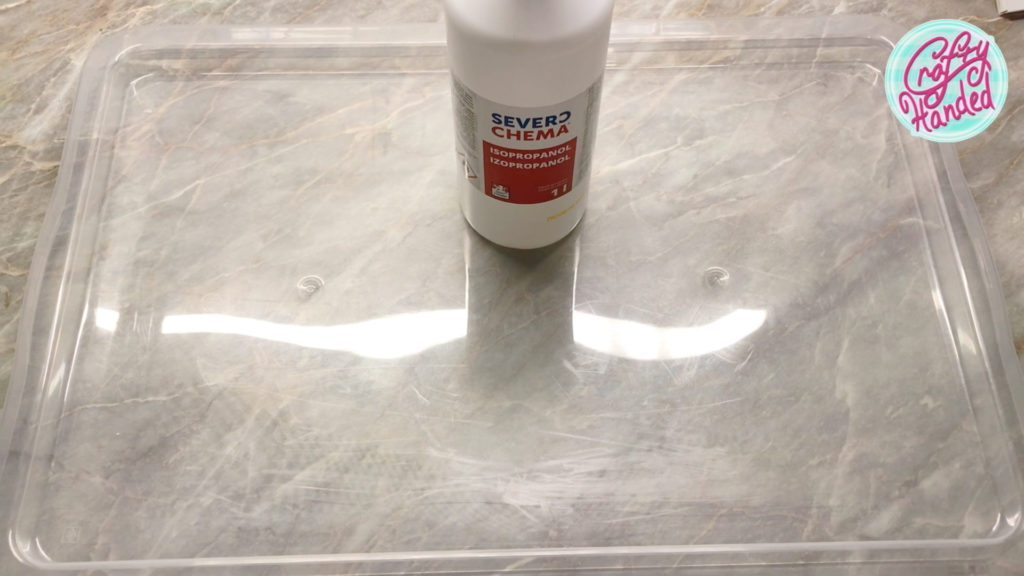
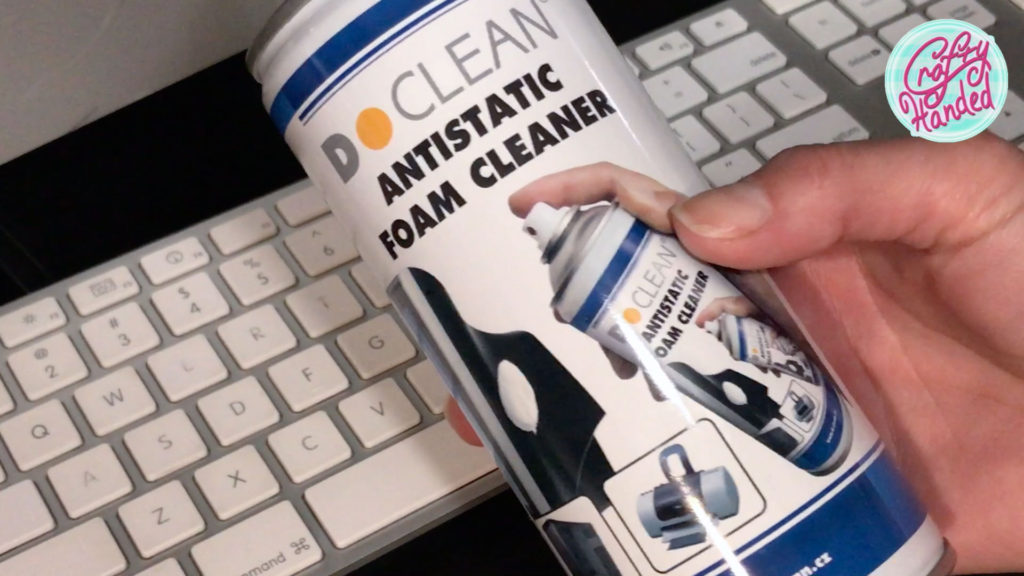
IMPORTANT: DO NOT wash your keyboard in WATER or anything that contains water because the contacts might rust. You will need 100% denatured alcohol. USE Isopropyl alcohol instead. It is great for cleaning electronics and circuit boards. It dries fast and leaves NO residue. Remember safety! You need to use it in a WELL ventilated area, preferably outdoors, or use a professional respirator. Follow all safety instructions. It is a highly flammable substance so of course, be miles away from any fire source. Remember that even vapors can ignite.
Ready to start? Take a clean plastic tub wide enough so you can place your keyboard in it. I didn’t have one so I used a lid from a storage box.
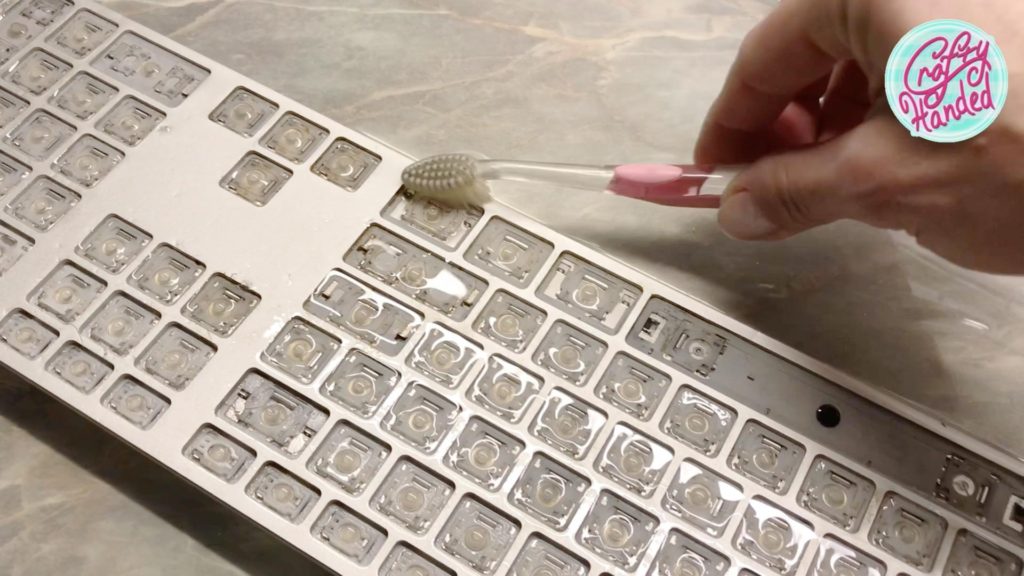
Put your keyboard in it and submerge it in the Isopropyl alcohol. Swoosh it around, and rinse as much dirt out of it as you can. If you need to, use a soft toothbrush, preferably not your friend’s, and gently rub the spots in need of rubbing. Flip the keyboard upside down and swoosh it again. Replace the alcohol with a clean one if necessary. Remember to dispose of the used chemical according to your local requirements.
When you are happy with your “laundry” drip any excess alcohol out of your keyboard. You can dab it with a soft paper towel and place the keyboard in a warm, dry place to dry up completely, preferably for a few days. It should dry faster, but it is better to be safe than sorry.
Apple Magic Keyboard Assembly
Now it is time to play a little puzzle with your loose keys and place them in the correct spots. Use your original photo as a reference, or google a photo of your keyboard online. Push the square keys down gently until you hear them click in place. Watch out for 6/9, M/W, H, S, N, Z, X, I, O, and the arrow keys. See the difference from the back side or watch my detailed video. Most of the square keys are oriented with narrower hooks towards the top. The exceptions are marked on my chart like F, J, 5,…
Now for the longer keys with a wire. First, you need to slide the wire through the little anchor holes (in the opposite direction than when you were removing them), place the key in the right place, and then push it gently down to click in place. The spacebar is again a bit specific. You need to guide the bottom wire first and then top wires in before pushing it down.
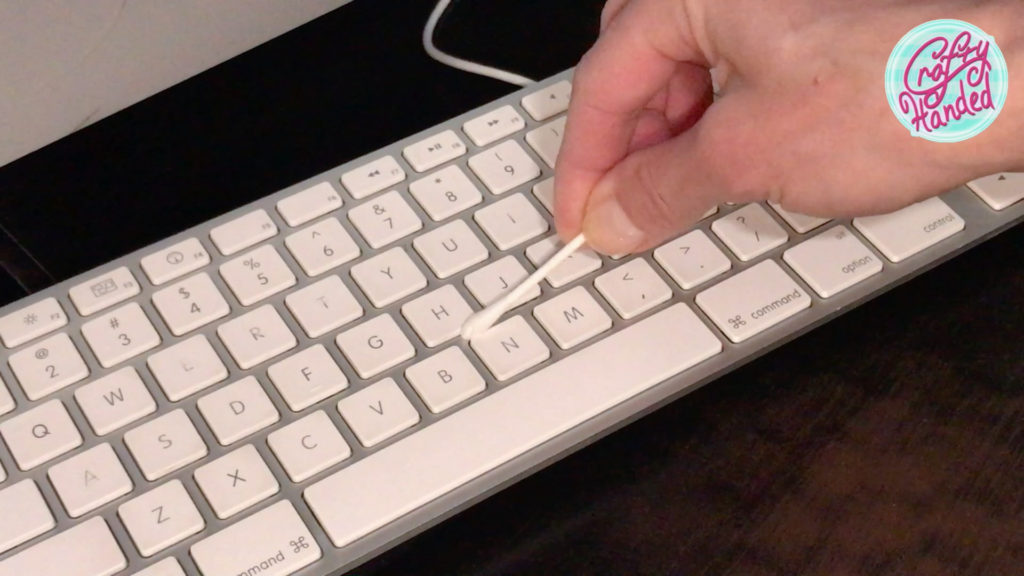
Later, I found some surface cleaning imperfections. Those are easy to clean with a regular electronics cleaner on a q-tip.
Rub it gently with a q-tip until clean.
Now when it’s all together, good to go, and the keyboard is completely dry, it is time to find out how we did.
Plug in your keyboard or put the battery in and see if it works. Well, I hope it does, but if it doesn’t …we did what we could. It might be time for a new keyboard after all… But YEY!!!! MINE IS WORKING! I hope you are successful, too!

Watch my full tutorial on my Crafty Handed YouTube channel …Or if you like what I do and would like to support me, please become my Patron.
More Tips
-
How to clean the Apple Magic Keyboard!
My cat usually just sends keyboard vomit messages. Until she decided to take it a step further! And I had to find a way to clean my Apple Magic keyboard.